

We had a Twinkle Twinkle Little Star party. Well, we were going to have a Twinkle Twinkle Little Star party, but it got a little derailed by me getting super sick and just knowing we were squeezing it in to dance recital weekend, it just seemed like too much. But, since Molly and I have been busy cutting stars out of empty cereal boxes and covering them in glitter for months, and since I have a blog, we had ourselves a birthday photo shoot.

From almost its inception, this was an experiment party....to see just how little I could spend and to try out maximizing these meager decorations on two photographable spots. That is $8 in streamers, and $6 in silver glitter stock from the scrapbooking section at Michaels. We already had gold glitter--I mixed Martha's fine glitter with standard school supply glitter (off Amazon, I believe)--and we had the scrap of glitter cardstock for the "Henry" topper. I spent about $6 on sprinkles and edible spray paint for the cookies and $3 on straws from Target. Tada!


But it is beautiful, isn't it? I knew making one was going to stress me out with everything that was going on, and I was too proud to get a cake just for a photo--it needed to taste good :) I made the tiny smash cake, which Henry had no interest in smashing. It was a mix from the Immaculate Baking Company, and the girls thought it was delish.


So yeah--the Monday before H's birthday was spent on two conference calls, photographing all my party stuff and then I rushed off to the airport. Normal, working parent stuff.

But it made me feel better about being out of town on his actual birthday. And don't worry, they had a nice fete with pizza and more cake (and less pictures) on Tuesday!
Execution Details
This is where I get into the weeds and share what I learned about glitter and crepe paper so that you can benefit from this experiment. And I divided it this way so that those of you who just winced can sign off-- Happy Monday!
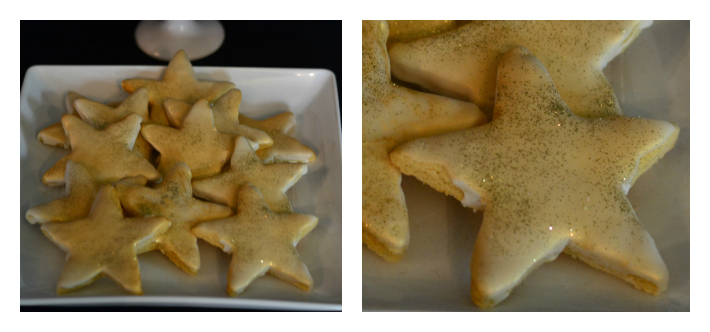
Okey dokey--let's start off with something that worked. The stars were exactly what I wanted. Mixing equal parts fine and standard glitter was worth the effort. Also, spray painting them gold first was a real time saver--that way I wasn't worried if the edges were perfect, etc. The key to having glitter around food (or in your house at all) is Krylon Glitter sealant. It really does keep the glitter from shedding. I think it takes away a little bit of the sparkliness, but they are still sparkly enough. The garland is still on my front porch...because I'm totally in love with it. (Spoiler alert: it will be appearing at Char's 9th bday, too).


For the cake topper I used pre-glittered cardstock. Its in the a la carte scrapbooking paper section at Michaels, etc. While expensive, it is sparkly and does not shed. Seriously. I did this primarily because I was super tired of glittering stuff, and food safety on the non-shedding front. I did use extra stars (with the standard glitter and Krylon) for the smash cake, but I wouldn't recommend it. Since it doesn't touch the cake (only the bamboo skewers) it probably doesn't matter but I don't like the idea of poly sealant near food. I'm sure I'd die if I went to one of the factories where they make plastic toppers :)

How did I cut that stuff out without a Silhouette? The old fashioned, eye-straining way of printing the letters out and tracing them with a ballpoint pen. Then cut along the invisible indented line left behind. You can also color with a crayon or pencil on the backside of the paper, trace with your pen and the crayon or pencil will create a more visible line. Just remember to print mirror image!
And while streamers are cheap...oh my god was this a pain in the neck. Attaching the letters to the streamers was painful--I know why they are always strung on a garland now. While I thought the different shades of blue (and black) would add some interest....I think a solid piece of fabric would have been fine since we have the stars and letters.

Cookies...I was happy with the Wilton glitter sprinkles. I was super unhappy with their gold spray paint stuff. Barely pearlescent--definitely not metallic. And such an unfortunate color, no? We added disco dust to both options. It wasn't going to save the gold ones, but it was something. Yes, I totally phoned in the baking and the icing here. But you get the idea...bothering to refreeze your dough (between cutting out and baking) and getting the proper icing consistency would take the level of polish up here.
I was also supposed to hire a photographer. The guy who shot Cinco de Molly was booked, and I figured I should justify the two new lenses I bought in February. Somehow I didn't really get a good shot of the food on the table--as in, I totally forgot to even try. And all those elevation shots are blurry, I know--so sad. I need to figure this wide angle one out. The 50mm was a little better, but....Obviously, I'm still figuring them out, and I would always recommend hiring a professional when possible. It's better to enjoy the party ;)

(My mom bought a few star balloon bouquets from Party City--they were a big hit.)
Henry's crown was from some craft foam we had lying around. The first try was with crepe paper--I though the stretchiness would be useful. Wrong! It stretched so that it looked more like a gnome hat. The greasy? icing sort of "stained" this, which is weird. It took a bit to spray paint it, so I would recommend only using foam if you don't need to spray it. Luckily, Henry hates hats so much he just removed it and didn't try to eat it but in retrospect I probably shouldn't have gone with spray paint for a one year old!
No comments:
Post a Comment